A lot has happened over the past month. Just when we think we are down to the finishing touches of one project, we begin the destruction of another! While this is always gratifying, it can also be terrifying! We have completed many of the finishing touches in our kitchen until the windows are installed, we completed the living room and added our fall décor (this makes Abigail very happy), and we are amidst our next HUGE project in the destruction department...taking down all of the original siding, adding spray foam insulation, and framing/installing our windows, front door, and two French doors.
Exterior

At our first farm picnic in early September, many of our guests and friends, noted that they had always seen this house on the hill on trips or on their way to work, and wondered about the history of this home. Now, we hear stories of people driving through New Jersey and checking on the status as they drive to their destination. Well, they are in for a surprise this fall/winter! Hummingbird Hollow is getting a face lift! In order to prep for spray foam installation, the dilapidated siding had to be removed. This was the original siding on the home and although it is old, it did not come off as easily as you'd think! This home was made to last! We wondered what we would find as we tore the siding off. We were hopeful that we weren't in for any structural surprises and of course, there were surprises, but nothing we could not fix. However, we did uncover some amazing craftsmanship that most people will never witness in this modern day. This house was truly built by hand with no power tools. Yet, it was built so strong that it could be around for an additional 200 years.We are currently working on completing the sides and rear of the house, but to keep the blog post small, we are only featuring the front of the house right now.

 |
| Our house is HIGH and it was scary setting up the pump jacks at times. |
 |
| Look at the size of those hand hewed beams. The main beams are true 6'x8's! |
If you look closely through the opening of this "soon to be" french door, you can see there is a second french door framed in the back of this room, too. Our home office will have an entrance to the front porch and an entrance to our patio in the back of the house. It will bring so much light into an otherwise, very dark room. It is going to be hard to get work done with these beautiful views!
 |
| We removed the original energy inefficient front door to make way for our new one! The entire bottom beam was rotted from improper door sill flashing and had to be removed. We encountered this problem in various areas of the house so they needed to be prepared before the insulation arrived. |
 |
| All new sill repairs were made using weather treated wood |
 |
| Our newly framed door now has a structual header (we had not yet installed the studs above the header in this picture. This new header will support the long span above. |
We purchased our front door in August. Abigail had been trying to convince me that this was the type of door she wanted. However, we couldn't find a door that we could agree on. Abigail wanted a front door that would let in a lot of light. Despite the transom windows on the original front door, it did not allow much light so we knew it was a change we wanted to make. We also knew we wanted a lot of windows so that we could look out and see our pond. Luckily, we stumbled upon this door when we weren't even searching. Abigail's mother always says, "things will happen when you least expect it" and she was right! Both of the side doors open and they have screens.
 |
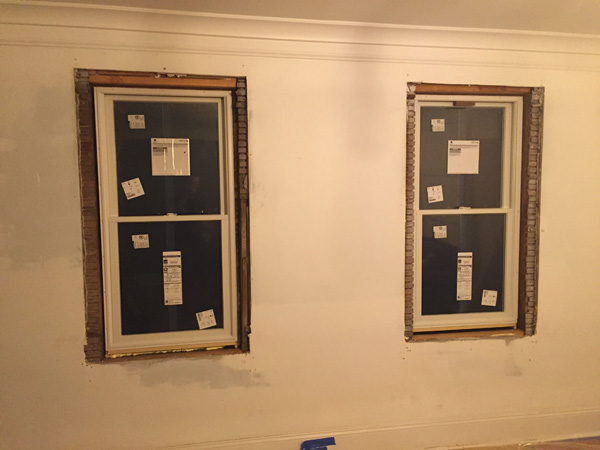
| Though it was a shame to take out all of the original windows, it had to be done. They were leaky, energy inefficient, and let noise and wind through them. |
 |
| Running our level line across all windows. |
 |
| We had actually paused at this stage so that we could have the building inspector come and look over our work. Normally, windows require headers, but we didn't feel that such rules were made with our 200 year old house in mind. We were correct. The inspector actually had a good laugh because he said our beams are stronger than anything used in modern residential construction. |
 |
| The headers we built are non-structural. They only will hold the windows in place. |
As mentioned above, we continued to discover random areas of rot as we removed the siding. Mostly because the siding had been compromised years ago and water had been doing damages for decades. The only water exterior water barrier was the siding; no wall sheathing, no WRB like Tyvek or tar paper. In a few select areas we found tar paper where they must have made repairs and added small spots of tar paper but 95% was the siding alone. The fact that the house is in as good as the condition it is in now is a true testament to the quality of construction.


Besides the two new patio doors and the front door we have decided to keep most of the windows close to the original size in order to maintain the early American farmhouse look. One exception to this decision was with the center, second floor window which over looks our pond. We decided to install a much longer picture window. Eventually, we will install a bench seat right under it with pillows so that our family can sit in the window and watch the seasons of our pond.
 |
| This picture jumped ahead a bit for this post |
You can see how much we had to replace in the picture above. However, what remains, belongs in a museum. Not only are the beams amazing but with further observation, you will see the roman numerals that were carved into the beams during construction. We truly admire the unbelievable craftsmanship, the hand carved beams with notches, wooden pegs and nails. The pictures do not do it justice. We think this ranks in our Top Ten List of discoveries on the farm thus far. And what is more exciting, is the fact that we have an entire West wing of the house to explore in the next phase of our home renovation! We are sure to make more discoveries!


Lady bugs are supposed to bring good luck, right? Well, we are going to be the luckiest home owners when we start our West Wing renovation. When we took down the siding and insulation, we discovered thousands of ladybugs! It is the time of year for ladybugs to hibernate and we are fortunate to have so many on our farm. However, we don't intend to have them move in with us.
Now that the front was prepped and ready for spray foam, we tarped it and waited for the spray foam company. We decided to try and capture a time lapse movie of the completion of the front of the house (Sprayfoam, sheathing and windows...siding will be installed in the spring.) We set up our ipad in the front yard and let the time lapse program run each day. You can view the full time lapse video here:
https://youtu.be/JKCKgAkqg2U
 |
| Once the front of the house was completed, they moved on to the master bath's vaulted ceiling and the attic |
 |
| Before we began the sheathing, we repaired some of the deteriorated foundation with some help from a friend, who happens to know nothing about masonry (haha), but he did great! |
For the exterior sheathing, we are using a fairly new product called "Zip-Sheathing". Typically, homes are built with a plywood or a OSB plywood and then covered with a weather resistant barrier (WRB) like tyvek. The the advantage to Zip-Sheathing is two fold 1) there is no need to install anything over it because it is a WRB in itself and 2) the Zip- Sheathing (when taped properly) is air-impervious but moisture-permeable. This means no air can enter or escape the envelope of our home yet any moisture trapped in the wall may escape. We are already achieving a very "tight" home with the spray foam but this will ensure our home will be one of the "tightest". We believe this will become the standard home sheathing in years to come.

 |
| After cutting out the window roughs, we installed furring strips to bring the windows out to the proper level to accept the siding that will will install in the spring. |
 |
| We will begin on the inside window detail once the exterior is complete. |
Living Room
Abigail's vision for the shelves in the living room has finally come to fruition. They are beyond what we had imagined and we are so pleased with how they have turned out. Abigail and her mother spent a few hours unpacking boxes that we haven't opened in months. However, one would think we planned these boxes according to how they would fit on the shelves. Every addition we placed on to the shelves added warmth and personality to our home. Many of these items are things we found at flea markets, antiques from Abigail's grandparents, gifts from friends, family members or blog followers, and books we have collected over time. We even found a place for the chair that Ted refinished when we first purchased our farmhouse. It is the perfect addition to our home! We are also very excited about the antique chest that we purchased at an antique shop just over the bridge in Easton, PA. We haven't had the time to research the chest amidst all of our projects, but we look forward to uncovering it's past in the near future. In the meantime, it will serve as our mysterious coffee table!


 |
| We fabricated the shelves out of the original attic floor board and the brackets out of interior salvaged wall beams |
Lighting
Abigail has truly enjoyed choosing the lighting for the farmhouse. While we have made a few of the pieces ourselves, our purchases for lighting have not been easy. It is much easier to purchase lighting for a new home because you don't have to worry about maintaining the integrity of the home. We did not want to add lights with too much shimmer or shine, anything too large, or something that would not be in a farmhouse. We also wanted to use vintage Edison lights. We were certainly up for the challenge and found it rather enjoyable. Abigail's favorite light in our home is the grandest light and will be seen by everyone who visits the farm or travels down the street below the farm. It is a Moravian Star that will hang in our second floor window, above the front door. The significance of this star is that Abigail is from Bethlehem, Pa, a city founded by Moravians. While the city has evolved with modern necessities, the Moravian influence and traditions are still very strong. One tradition that remains is the Moravian Star. Although, Bethlehem has it's own Bethlehem Star, the mix of the Moravian Stars and Bethlehem Stars are prominent among buildings, store fronts, businesses and private homes...specifically, the home that belongs to Abigail's parents! Abigail has admired how the light filters through each point and welcomes her parent's guests through their transom window. Abigail wanted this for our home so that friends, visitors, and those who pass by, will feel the warmth, love, and welcoming of our new home. Most significantly, our star will shine on our hill as it faces nearby Hope, New Jersey, which was also founded by Moravians. We have always felt at home here, and perhaps, this is one of the reasons.

Installation of our star
The star looks great now, but imagine how it looks with the new windows!
This light is located in our main foyer. It was inspired by our favorite show, Fixer Upper, and compliments the vintage orb that will hang in the dining room.
Lighting in the kitchen proved a little tricky as we worked around the original beams and the angles of the island.
This light took us months to find. Since our finishes in the kitchen are chrome, we wanted our lighting to match. However, finding this design in chrome was tricky. Fortunately, after many Internet searches, we found what we were searching for and we love that we still have the farm look with some added elegance.
 |
| This hangs over our kitchen table |
 |
| This light hangs over our kitchen sink. We can't wait for the window to be installed behind it! |
 |
| This light was inspired by our new four post bed |
 |
| This light is at the top of our center stairwell |
Bathroom
The bathroom has been evolving for months. While we have always had a design planned out and we've had fixtures since February, the bathroom goal was to get it functional (which we did months ago) and move on. We weren't living here full-time, so it just needed to had the necessities. Now that we are approaching our "official" moving day, it was time for the bathroom to go from functional to practical. We also needed to prepare for the delivery of our washer and dryer. Since our laundry room is connected to the bathroom, it was time for some finishing work! The floors are now grouted, despite the fact that no one believes they are tile, the washer and dryer are installed, and we have functioning faucets!
Ready for the washer and dryer delivery!
 |
| We have power |
 |
| Yes, we have a washboard as a decoration, but in our farmhouse, we will have all of the modern luxuries we are accustomed to using! |
 |
| We assembled galvanized legs for the vanity base and hung them in one of our barns so that we could spray them oil rubber bronze |
 |
| Installing our wall mounted faucets was not easy. Even our plumber friend nicely suggested we save ourselves the aggravation. |
 |
| Assembling our custom vanity |
 |
| We purchased this piece of wood from a salvage store and repurposed it as our vanity base. |
 |
| Prepping for the sinks. |
Our poor old tree:
Oh, and did we mention our tree fell down? Yes, it just fell over! We've been avoiding taking this tree down since we purchased the home. Abigail has asked , "when are we going to take the tree down?" several times over the past year. However, everything structural always took priority over the tree. We guess the tree decided to make itself a priority! One day, after work, I pulled into the driveway, and to my surprise, the tree had just fallen over! If you recall, my father and I had just redone the walkway, yet it was not harmed! And if you look closely, the pool house and pool are to the left, yet they were also untouched. But most importantly, the tree had tipped directly toward the sun room and kitchen....again, untouched! Miraculously, this ENORMOUS tree had fallen on the perfect angle to miss every structure by inches! Yes, INCHES! We are so lucky that nothing was damaged. More importantly, we are fortunate that no one was injured. Fortunately, our buddy Joe, came to the rescue and helped clear the tree away so that we could continue to move forward on the house project.


 |
| This is how we will leave it for now until our more important projects are completed |
For the next month we will be completing the rest of the exterior, installing our new heating system, and with any luck... moving in!