Lincoln Quote

Lincoln Quote

Tuesday, December 30, 2014

Life after demo...

Let the slow progress begin!

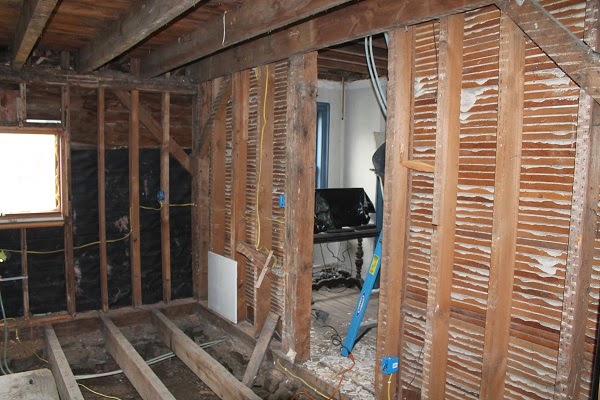
It has been over a week since we have posted progress.  Not because of lack of progress, but rather, lack of time...  Rest assured, we are making progress!  Three dumpsters later and the interior demo is complete.  In addition to removing various ceilings, floors & walls, we removed all of the plumbing and electric and set it aside for scrap $$$$.


Radiant heat flooring was the next item on our list.  The entire home will utilize radiant heat flooring. Though it is the most difficult and expensive of all heating systems, it is far more efficient and provides superior comfort.  The diagram below illustrates why radiant heat is a far superior method.


Also, radiant heat does not stir up dust and allergens, does not dry out the air, and nothing is better than walking barefoot on radiant heat in the winter.

Oxygenated PEX pipe with aluminum heat transfer plates


There are two ways to install radiant heat flooring 1) below floor (pictured above) and 2) above floor. Below floor is not as efficient as above floor (though still more efficient that baseboard or forced air) but is necessary if you want to keep the existing floors (and we do!).  We have completed installing below floor in the entire original section of the home in order to keep the 200 year old floors (living room, hallways, dining room, master bedroom and guest room).  All of the other rooms (kitchen, all bathrooms, den, and second guestroom) will be above floor radiant heat, which we have not yet installed.

Over the Christmas break, we enlisted the help of Abby's father and brother to begin assembling the kitchen cabinets.  It is a bit premature but we figure if we put a few together each week they will all be assembled by the time we are ready to install.

Abby taking full advantage of being small

Sneak peak at our cabinet style and color
While the Ackermans were busy making cabinets, I put on my electricians hat on and went to work! Before anyone sends us warnings about being careful with electric and that we should leave it to the professionals... you should know that I worked for an electrician for over two years in high school and have fully wired everything from new residential homes to trunk lines in the Rockaway Mall (600 amp service!)  So rest assured, I know what I am doing.  Plus all of my work will be inspected by the building official. 

All 20 amp outlets with five dedicated lines in the kitchen alone!
We will replace the existing box with a new larger 200 amp service
The first lights are in!
The original layout of the house has an entry from the kitchen to the living room. However, the layout for our dream kitchen did not allow for the entry to remain.  The entry to the living room will be from the existing foyer.  We used closing up the door to our advantage and dropped the second floor's radiant heat pipes down to the basement where it will connect to the geothermal heat pump.


Next, we completed the framing for the half bath and ran the plumbing, dedicated hot and cold supply lines, to both the half bath and the kitchen sink.  The cold line will be split in the half bath for the toilet feed and in the kitchen for the dishwasher and refrigerator.  


My first ever PEX crimp connection

Over the years I have become very good at sweating copper pipes, however, it will do us little good since all supply lines will be PEX pipe.   I have never installed PEX but when has knowing nothing about something stopped me before?

We intend to focus most of our efforts on the kitchen and half bath until they are complete before moving on.  The exception will be while we are waiting for all of our inspections. These are necessary but unfortunately will slow the progress down.  Until next time...


Tuesday, December 16, 2014

Will Demo Ever End?

Will Demo Ever End?

That's how we feel.  But the truth is there is still a lot of demo in our future.  We are only focusing on the interior of the house at this point and that's more than enough!  Since our last update we have:

1) Removed all electric and plumbing. The electric and plumbing wasn't even original but was still far too old to be considered modern.  For example, all of the copper was 1/2".  I'm not sure about you but I enjoy the ability to be able to flush a toilet and not worry that my wife will be scolded by hot water in the shower!  Thus, we will be installing all plumbing and electric from scratch to meet modern building code. 

Second 30 yard dumpster


2) Removed the kitchen floor.  Crawl spaces are a target for problems so we are not taking any chances.  The kitchen was the last of two crawlspaces that were gutted.  The next step will be to support the floor joists and then install a vapor barrier before insulating the floor.


3)  Demo our master bedroom / master suite.  We are trying to move as fast as we can, however, it is so difficult to move fast when there is so much history and so much to see.  

Your eyes immediately went to the floor, but that is for another post.  Focus!

The door hinges...

Despite our love of the history, demo is necessary.  With much trepidation, we continued to tear down walls and ceilings.  To our surpise, we found yet another layer of history!


The wall paper isn't exactly our taste but we can't help but imagine the history here.  Also, the ceiling was a false sheet rock ceiling...


Layer after layer, we continue to make progress. Surprises continue to be around every corner... for example:


Yup!  That is some type of animal's nest in front of some type of hornet or wasps nests!  

One would think, with the Christmas holidays approaching, that the speed of this project would start to slow down. However, we hope to use the holiday season down time to work even faster!  After all, our ultimate intention for the farm is to enjoy holidays such as Christmas on our farm with family!

Thursday, December 11, 2014

Demo and More Demo

Mr. Gorbachev, Tear Down This Wall!!!

Apparently we are running short on witty opening titles. Nevertheless, we have been extremely busy with demolition. Approximately 90% of interior demolition has been completed.  Here is some show and tell:

The "Cat Room" Before

When purchasing the home, we referred to the den as "the cat room".  The previous owner, an elderly woman, spent most of her later years primarily in this room with her cats before she moved out.  Due to the lingering feline scent, we decided to gut the entire room (walls, floor and ceiling).  We made sure to salvage the old driftwood paneling walls.  We plan to wash, sand, plane, rip, and miter the planks in order to re-purpose them as hardwood floor insets in the kitchen! Whenever possible, we will savage original items throughout the home and out-buildings.

The Den (After)


And yes... the floor beams are trees, literally!  It's too bad that these will get covered up again unless we started a new trend of "open concept floors", just watch your step!  Now that the floor is open, we will install a center beam running perpendicular to the joists, with two sonotube concrete footings.  Since the beams are so old and the span is 20', the new center beam will eliminate the future risk of sagging.  Finally, before installing the plywood, we will install a plastic vapor barrier on the ground and some form of insulation (still researching that).


The Guest Bath (Before)


The Guest Bath (After)


We temporarily left the sink, toilet and tub for use while we work.  The glowing wall in the picture above is a view into the kitchen downstairs!  This turns out to be very helpful because it allows us to install metal rafter brackets which weren't available when the home was built.  The original bathroom had a wall dividing it from a small back room that had no recognizable purpose. We removed the wall and will be redesigning the layout to include our future laundry room. (The previous owner had the washer and dryer installed in the kitchen)


The "Blair Witch" Basement (Before)

The Basement (After)

Not surprisingly, we discovered more neat craftsmanship on the original wood stairs.
This was a nasty job but what a difference!  Just the change in smell alone was remarkable.  Being a unfinished basement with no vapor barriers, mold and mildew had wreaked havoc on every surface. All of the debris and insulation was removed and each surface sprayed with a diluted bleach solution and scrubbed.  The after shot may still look a bit creepy but wow, what a difference!  Eventually, we will be completely finishing the basement; converting the entire space in to a conditioned moister controlled environment.  In order to accomplish this, the floor will be dug out 24" and replaced with gravel, 4" foam board insulation and topped with a 4" concrete floor.  Finally, the walls will be lined with 2" airtight foam board. Once completed, we will use the basement for temperature and moisture controlled storage space.  


The more observant readers may have noticed the 55 gallon oil drum in the back of the basement connected to the boiler.  You are looking at our "one of a kind make-shift above ground home heating oil storage tank"!  The original tank was buried underground and the bank required the seller to remove and discard it.  Since the boiler is over 30 years old, we will be upgrading the entire heating system (geothermal pond loop). But, in the mean time, this was a cheap and effective way to use the current system for heat.

This weekend we plan to fully complete demo, which includes the removal of all plumbing and electric.  Also, if time allows, we will begin the installation of the radiant floor heating!  Stay tuned...

Tuesday, December 9, 2014

Attic Demo Day

ONE WORD, GROSS!

Today we decided to take on the attic.  During the home inspection, the inspector pointed out a small pile of guano (bat poop), and he told us that there was probably a lot more behind the foil insulation that was pinned up... and he was right!  Tons and tons of guano.  Luckily, there were no bats to be seen.  Maybe it is because the attic had since been properly sealed or perhaps they all died from the white nose disease that has decimated the bat population (over 6 million have died as a result since 2007).  I was carefully to wear a respirator and goggles during my guano farming.  A coworker had told Abigail that people pay good money for guano as fertilizer, but you couldn't pay me enough to deal with this crap for a minute longer than I had to.


The goal for today was the removal of the foil insulation and any other hidden treasures that might be attached to the ceiling. 


Those of you with a keen eye may have seen this gem in the back corner of the picture above. Luckily, we were able to negotiate keeping this and a few other nostalgic items .  Those of you who continue to follow the blog will see this piece again, repurposed in a spectacular fashion. 


I can't even imagine how many bats called our attic home at one time. It's a miracle that the insulation didn't fall down  from the weight of the guano. Fortunately, the thin foil insulation was the only thing attached to the roof. Besides the guano, there was a lot of slate; evidence of the original slate roof. It's really a shame that they did not keep the slate roof. However, the roof is not leaking, so we'll take it. 


The rafters in good shape and are original. Fortunately, they replaced the roof decking with modern plywood when the previous owners re-did the roof.

Since I have experience building houses, I immediately noticed that there is no ridge vent or soffit vent. Vented roofs have been common practice by most builders for the last 50 years. Good thing other contractors had shown me in the past how to properly vent a roof, right?  Wrong!  

For the past few weeks I have been obsessed with researching building science and home efficiency. It turns out that the science behind vented roofs isn't  even actually science. Yes, it is one way to control condensation when done correctly, but not required nor optimal. 

For anyone interested in the science I will include a link below explaining this topic. Rather than venting, we will insulate directly against the roof deck with closed cell spray foam. It will provide an airtight roof which is key in controlling moisture. Finally, we will face the ceiling with 2 inch R Max foil foamboard to prevent thermal bridging, which is caused by the low r-value of the wood beams. We will be sure to post in detail when we get to that step.